4 Basic Pottery Techniques For Beginner Students
Pottery is among the most enjoyable and relaxing artistic forms that beginners can try. The process of working with clay lets students combine their creativity and practical skills, and transforms organic materials into practical as well as decorative objects.
In this comprehensive guide to Pottery techniques for beginner students, learn the fundamental techniques, tools, and tips that make learning to use pottery enjoyable and productive.
Hand-building Techniques
Hand-building is among the most adaptable and user friendly methods of making pottery. At Creative hands pottery studio, our goal is to introduce children to fundamental hand-building techniques that allow them to experiment with their creativity without using the wheel. The techniques focus on creating clay with your hands, using only a few tools, making them ideal for novices and enthusiasts alike, as well as for those who like hands on and crafts.
If you’re making your first bowl or creating beautiful home decor using hand-building techniques, they aid in understanding clay’s behavior, structure, and form from scratch.
Pinch Pot Technique
The pinch pot is actually the very first-hand building technique students learn here at Creative hands pottery studio.
How It Works:
- Start with a ball of clay
- Push your thumb into the middle
- Tap and circle gently to stretch the walls evenly.
Why We Teach It:
- Builds finger strength and control
- Teaches even wall thickness
- Encourages free-form creativity
Ideal Projects:
- Small bowls
- Tea light holders
- Mini planters
- Decorative keepsakes
‘One Simple Trick!’ teaches you the fundamentals of balance and proportion in pottery.
Coil building
Coil building students will be able to concentrate on larger and more organized projects.
How It Works:
- Roll out clay into long, rope-like coils.
- Stack coils in layers
- Score and slip between layers
Smooth or texture to suit painting preferences
Benefits for Students:
- Develops structural understanding
- Encourages patience and precision
- Perfect for testing different shapes and textures
Ideal Projects:
- Vases
- Large bowls
- Sculptural forms
- Decorative containers
In our studio, students frequently like to leave the coiled textures visible for a raw and handmade appeal.
Slab building
Slab building is ideal for making clean, modern and geometric forms.
How It Works:
- Roll clay into flat sheets
- Cut shapes using templates
- Assemble with slip and score
- Refine edges and surfaces
Why It’s Popular:
- Easy to measure and plan
- Great for functional pottery
- Promotes creative patterns and carving
Ideal Projects:
- Mugs
- Plates
- Boxes
- Wall art
- Name plaques
This format is so popular in our beginner workshops because it mixes creativity with a bit of structure.
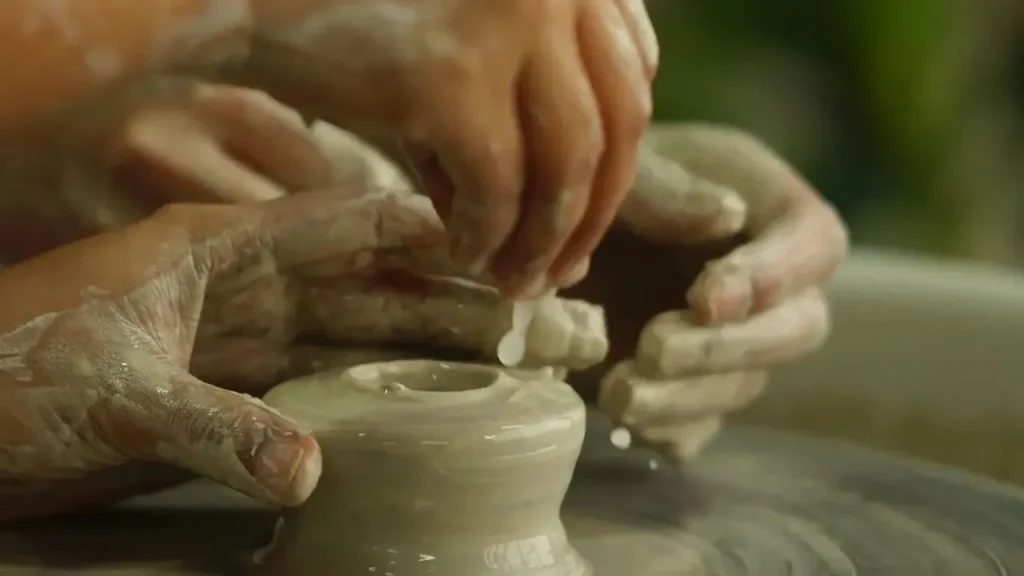
Wheel throwing
The wheel throwing process is an exhilarating experience for novice pottery learners. Though it can seem challenging initially, mastering just the basics of throwing, especially centering, can swiftly increase your confidence. Beginning at the foundational level, there is no need for the ultimate goal, but control, stability, and knowing how clay reacts to pressure and pressure.
If you’re looking to test the clay wheel, begin with basic, easy shapes like cylinders. These forms teach the basic mechanics of the wheel that each successful work is based on.
Centering Clay on the Wheel
It is the basis of wheel throwing. If the clay you are throwing isn’t aligned properly, the entire piece can wobble and make it challenging to create uniformly. Consider a centering process as building a solid foundation before building the shape.
Basic steps for centering
- Make a wedge of the clay.
Get rid of air bubbles, and then create an even consistency by mixing the clay well.
- Connect the clay on the Wheel Head.
The clay should be firmly pressed into the middle of the wheel.
- Apply steady pressure
Utilize two hands at the same time–one applying upward pressure and the other moving from the top, to help create an even, smooth mound.
- Open the Center
Using your fingers, press gently into the center as the wheel turns to create an opening.
- Lift the Walls upwards.
By applying the same pressure on both sides and slowly lifting the clay walls into a cylindrical shape.
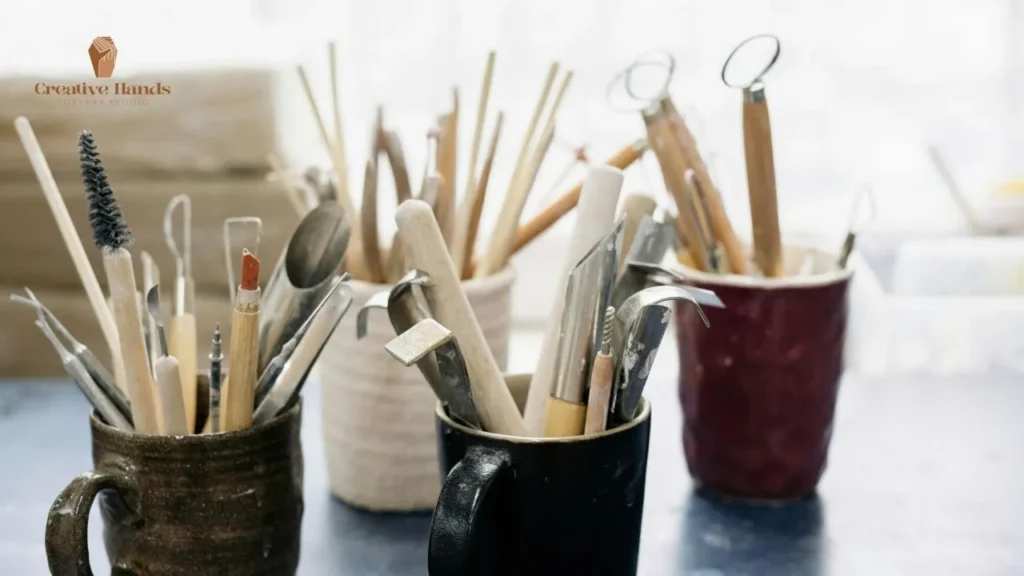
Basic Pottery Tools
1. Clay (Stoneware is Beginner-Friendly)
It is recommended to use stoneware clay for beginners due to:
- It’s tough and tolerant.
- Well-kept shape.
- It is great for handbuilding as well as wheel throwing.
- It is great for crafting practical items such as bowls and plates.
2. Wooden Modeling Tools
Simple shaping tools can assist in:
- Carve details
- Refine edges
- Straight seams
- Create decorative textures
They are flexible, making them an essential part of any beginner toolkit.
3. Wire Clay Cutter
A wire cutter is used to:
- Slice large blocks of clay
- Lift off finished pieces from the wheel
- Trim clay evenly
It’s probably one of the most commonly used things in a pottery session.
4. Sponge
You may want to use a natural or synthetic sponge:
- Add moisture to clay
- Smooth surfaces
- Clean excess slip
- Control water on the wheel
It’s tiny but incredibly powerful, particularly for shaping and finishing pieces.
5. Needle Tool
The sharp, pen-like, pencil-like instrument is great to use for:
- Cutting edges
- Cutting small details
- Test wall thickness
- Scoring clay before joining
It’s accurate and crucial for advanced and beginner ceramicists.
6. Rib Tool
Rib tools (wood, steel, or rubber) are utilized to:
- Compress and shape clay
- Smooth surfaces
- Strengthen walls
- Refine curves
They’re especially useful for creating bowls and cylinders.
Understanding Clay Stages
Teaching beginners about how clay responds as it dries, and as each form goes into the kiln for firing is so important. Clay is not static — it changes at each step. Knowing when to form, cut, attach or glaze your piece helps avoid cracking, warping and breaking.
Here is a concise rundown of each of the clay stages and what you ought to be doing at them:
Plastic Stage – Soft and Workable
This is the state of clay when it has been recently wedged and is completely wet. It’s flexible, easy to bend and perfect for molding your piece.
Best Activities During Plastic Stage:
- Handbuilding
- Wheel throwing
- Attaching handles or decorative elements
- Major shape adjustments
Important Tip:
It should be smooth and pliable — not sticky or overly wet. Too much water will undermine structure and possibly cause collapse.
This is the most imaginative phase of development, when your primary shape emerges.
Leather Hard – Firm but Carvable
When you reach the hard leather stage the clay is partially dried. It is firmer than cheese but retains moisture.
Best Activities During Leather Hard
- The trimming of the wheel-thrown pieces
- Carving decorative designs
- Refining edges
- Handles that are attached (when each piece is similar in water level)
Why This Stage Matters:
Clay is durable enough to handle detail, yet flexible enough to make modifications. For beginners, this stage is perfect for adding character and texture.
Bone Dry – Completely Dry and Fragile
Bone dry clay has shed any visible moisture. It is lighter in color and feels room-temperature when touched.
Characteristics:
- Extremely fragile
- It is not possible to alter the shape of
- It is easy to break
- Preparing for firing the kiln
Important Warning:
Do not attempt to add water or join the clay in this phase, as it can result in cracking. Carefully handle bone dry pieces and make them ready for kiln firing.
Bisque Fired – First Kiln Firing
The first time you fire the kiln, clay becomes ceramic. It is referred to as the bisque stage.
What Changes:
- Clay is made to be hard and porous.
- Does not dissolve anymore in water
- The strength is stronger; however, it’s not yet glazed.
Best Activities During Bisque Stage:
- Application of glaze
- Cleansing dust off surfaces
- Slight sanding (if required)
The porous surface helps the glaze stick evenly before the final firing.
Glazed & Fired – The Finished Product
The item returns to the kiln to finish the firing.
Final Results:
- A smooth, glass-like surface
- Waterproof
- Durable and effective
- Bright colors
This is the moment when the clay is changed into ceramic art.
Tips to improve faster in pottery
1. Practice Wedging Every Session
The process of blending clay goes beyond simply preparing it. It’s a way to build skills.
The reason it is important:
- Get rid of air bubbles
- Creates consistent moisture
- Improves the structure of clay
- Hand control is strengthened.
If you can secure the edges at the beginning of each firing session, you will not only prevent cracks from forming but also improve control and understanding of the materials.
Pro tip: Treat wedging as an element of learning and not as an obligation.
2. Focus on Repetition
One of the fastest methods to increase your performance is repetition.
you can aim for:
- Build or throw multiple identical types
- Check shapes and their thickness
- Take the lessons learned from every attempt
Each bowl will teach you something new: centering the hands, drawing walls, and creating curvatures. After the fifth bowl, the hands naturally change and develop.
3. Keep Clay Covered to Maintain Moisture
Clay dries faster than people who are new to the field.
To avoid:
- Cracking
- Drying is uneven
- Material that is discarded
Cover your clay in plastic after not being used. In the case of pieces in progress, lightly protect them from drying time and ensure that the clay is still usable
4. Embrace Imperfections
Pottery made by hand is designed to convey the touch of a human. Minor variations in the texture or shape do not constitute flaws. They’re more character.
A lot of professional ceramicists embrace the concept of natural imperfection, which is often connected with the concept of wabi sabi, which is finding the beauty in imperfection.
Instead of trying to achieve the perfect machine:
- Appreciate unique forms
- Take lessons from mistakes made in the past
- Watch each piece progress as it is completed
- It’s a good thing to let yourself experiment, without fear.
Final Thoughts
Learning the art of pottery for beginners is a thrilling experience that combines imagination, perseverance, and hands-on practice. Here at Creative hands pottery studio, we believe that every student can experience the delight of creating clay by hand or on the wheel.
FAQ
1. How long will it take to master basic pottery?
The majority of students are able to master basic techniques in pottery in just 4–6 weeks, with constant practicing.
2. Do you think wheel throwing is hard for newbies?
Throwing may be difficult at first, particularly on clay. But with the correct instruction, beginners gain speedy improvement.
3. Do I require expensive equipment to begin pottery?
No. For beginners, they only require simple tools like wire cutters, clay wood tools along with a sponge, as well as a rib-tool.
